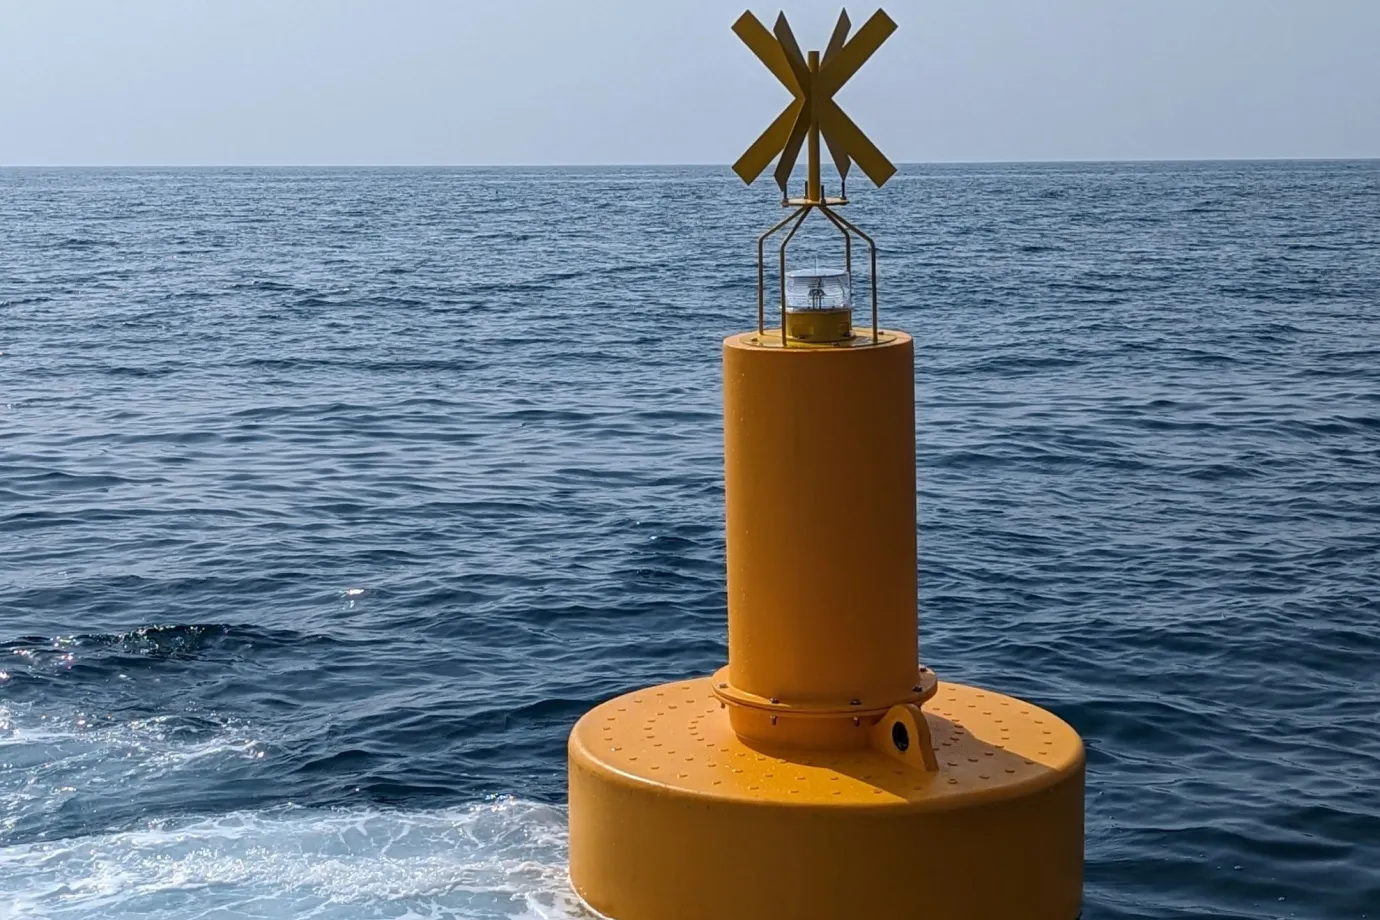
The high cost of installation and uninstallation of safety booms has forced many dam operators to purchase expensive permanent booms to address seasonal safety issues. However, there is a more accessible and more affordable solution – installing a temporary canoe boom that you can assemble and disassemble yourself in just a few hours.
In this blog post, we will walk through the 12 simple steps to assemble a canoe boom, one type of versatile, customizable safety boom for dams and waterways. We will provide illustrated guidance to assemble its modular components, including floatation cylinders, steel tubes, wire rope, grips, and shackles. With minimal tools and oversight, you can build an effective boom barrier for a fraction of a prefabricated permanent boom.
By following this straightforward safety boom installation guide, dam operators can save thousands in construction costs while effectively enhancing safety during high season. Installing your removable system also means you can fully disassemble and store it away during off-season months.
Want to streamline your project? Our “safety booms” are engineered for fast, tool-free installation and long-term durability.

What is a safety boom?
A safety boom is a floating barrier installed on rivers, lakes, and harbors to protect the public and infrastructure by restricting access to hazardous areas. Commonly placed upstream of dangers like dam spillways, water intakes, and fast currents, safety booms create a safe perimeter that guides debris and alerts people to avoid risks ahead.
These booms are critical tools for government agencies and dam operators to enhance safety on navigable waterways. They are typically large floating barriers made of cylindrical floats, steel cables, and chains that can stretch hundreds of feet to restrict access across the surface. Safety booms can also prevent flood debris like large logs from reaching vulnerable dam intakes and sluice gates. Customizable, modular designs can be configured to safely divert traffic away from structures vulnerable to collisions along busy harbors.
In short, whether guarding a small craft harbor entrance or securing a vast dam infrastructure, safety booms provide an indispensable line of defense. Their bright colors and solid barriers command attention, so boaters, swimmers, and floating objects are conservatively directed away from dangerous waters. Safety booms with customized components and strategic positioning avert unintended and deliberate unauthorized access to critical infrastructure.
See also: “Provide Safer Waterways with Safety Booms“
Why safety boom installation is important?
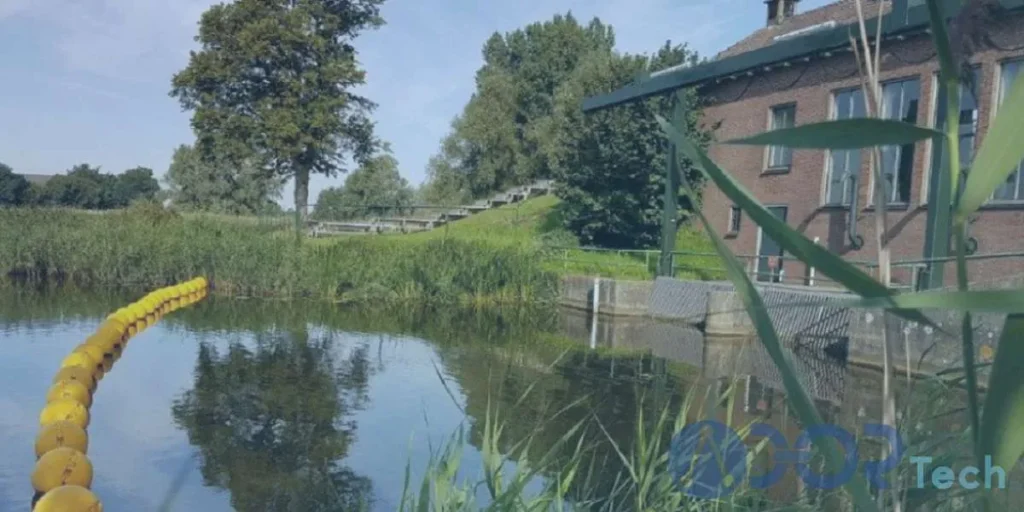
Properly installing safety booms is critical to creating an effective containment system and protecting essential on-water infrastructure. While there are multiple boom types and setup methods, having clear instructions and training helps optimize the deployment process. Correct assembly promises easier future reinstallation and use. It also minimizes safety risks for workers managing boom systems.
A vital advantage of some safety booms like the Canoe Boom is that they are designed for straightforward assembly, even by personnel with minimal experience. The modular components and attachment hardware allow sequential connections of floats and cabling. This simplifies on-site preparations with essential equipment and human resources. A smooth installation then assures security benefits from the barriers for applications like dam reservoirs and water control channels.
The need for simplicity also extends to time and costs associated with initial and recurring installations. Complex assembly procedures require more trained staff, special tools or costly external contractors to deploy booms effectively. Unclear instructions create delays in determining proper component arrangements. However, straightforward designs can be set up efficiently without excessive expenditures. This makes maintenance of the systems for long-term usage more feasible.
For sensitive dam infrastructure specifically, easy-to-deploy booms enable adjusting or expanding protective barriers as conditions dictate without relying as heavily on outside services. Having versatile, economical boom systems is key where water control is paramount. Overall, clearly outlined assembly steps, uncomplicated parts, and flexibility in where and how booms can be installed increase viability across numerous industry and environmental applications.
ADOR Safety Booms Assembly Instruction
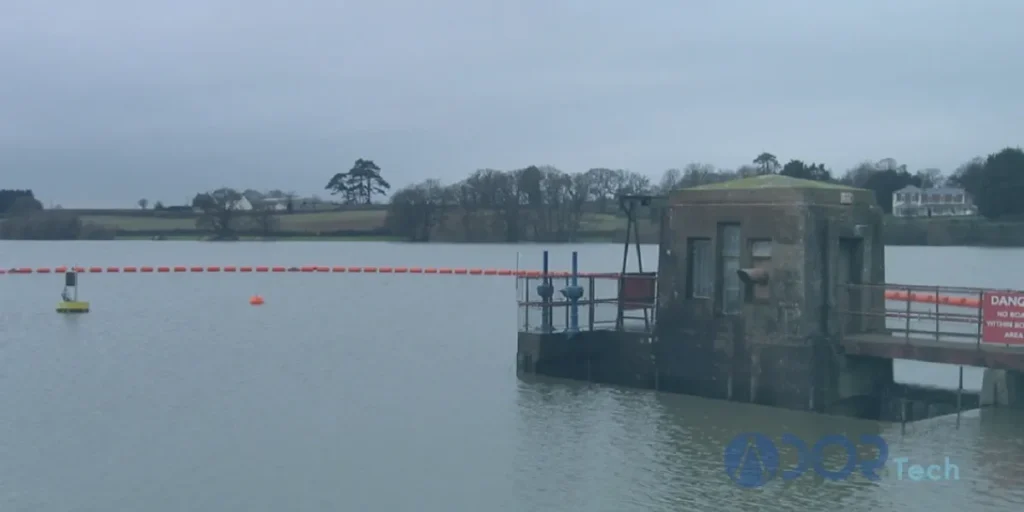
There are various types of floating barrier booms used to surround and protect areas in bodies of water. These safety booms all serve a similar purpose, but their designs, components, and installation can differ significantly. One such boom type is the canoe boom. The canoe boom is one of several common boom variants used for safety and containment purposes on water. Other booms include curtain booms with skirt-like barriers and more rigid, connected booming systems. As the name implies, the distinguishing characteristic of the canoe boom is the use of floating cylindrical tubes reminiscent of canoes to provide the flotation.
While sharing the same overarching protective functionality as other marine booms, the canoe boom has its own set of parts and assembly requirements. The following instructions detail the process for properly installing a Bolina-branded canoe boom system. It involves connecting a series of steel cabling, floats, washers, bushings, tubes and shackles in the correct sequence using proper techniques.
Safety boom assembly steps are tailored specifically for a canoe-style safety boom versus other configurations, which would have their own component and setup requirements. However, the result is deploying a floating containment barrier around sensitive on-water areas to prevent external contamination and provide security, as accomplished by numerous boom varieties. Understanding the variability between types, we can now focus on assembling this canoe boom example.
ADOR Canoe booms provide customizable floating barriers to restrict navigation access for water safety using common hardware parts. An operator can create an adjustable safety boom by linking cylindrical floats, steel tubes, washers, and wire rope. The complete installation process involves twelve key steps:
Step 1: Line Up the Floats
Step 1 for safety boom installation: Start by lining up the cylindrical floats needed for the desired boom length along the shore, evenly spaced about 1 meter apart. Ensure enough shoreline area is cleared to lay out all the floats. When assembled, the floats form the floating barrier portion.
Step 2: Insert the Wire
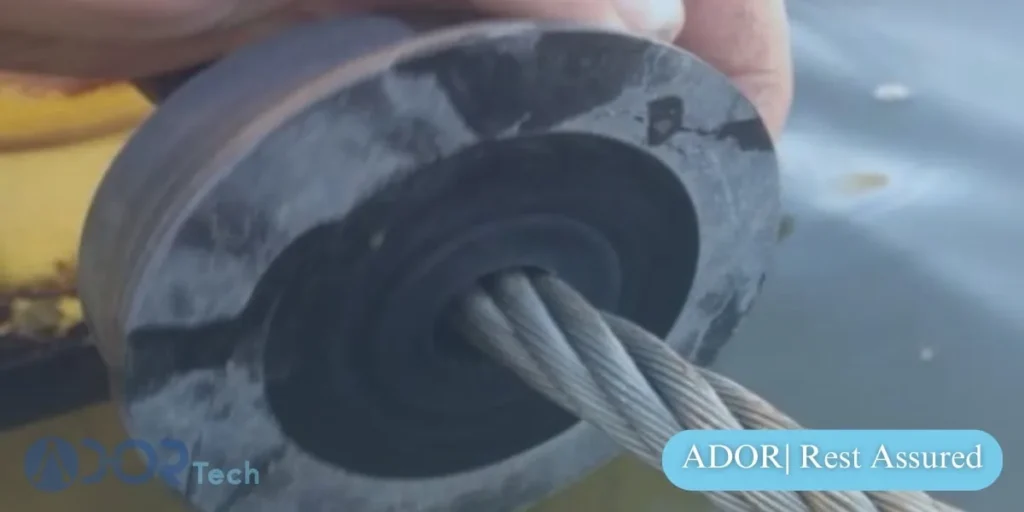
Step 2 for safety boom installation: Secure one wire rope grip approximately 300mm from the pre-fitted hard eye at one end of the wire rope. This helps hold components in place during the remaining assembly. Thread the loose end of the wire rope through a steel washer and the first tapered PVC float bush, the narrow end entering first to fit inside the float tube.
Step 3: Insert Wire and Steel Tubes
Step 3 for safety boom installation: Push the wire rope through the first float tube and then through the second float bush, oriented the opposite way to fit inside the second float properly. Slide a second steel washer over the wire rope, followed by the first galvanized steel support tube. Next, add another steel washer and the third float bush, oriented again to fit snugly into the second float tube.
Step 4: Assemble All Floats
Step 4 for safety boom installation: Repeat the process from Step 3 by threading the wire rope through additional floats and alternating float bushes, adding a steel washer after each component. Install all galvanized steel tubes between floats as spacers. Complete the assembly by ensuring the wire rope is passed through all floats using the required number of float bushes, washers and tubes.
Step 5: Install First Wire Rope Grips
Step 5 for safety boom installation: With the pre-fitted hard eye end wire rope grip still in place, push the first float bush fully into the adjacent float tube end. Slide the next steel washer flush against the bush. Apply the second wire grip around the rope and tighten it to firmly hold the float and components. Repeat this process on the opposite float end, sliding the first tube toward the second grip, leaving approximately 5mm of play for flexibility.
Step 6: Install the Second Set of Grips
Step 6 for safety boom installation: Continue installing wire rope grips around the rope and inside both ends of each subsequent float. Ensure float bushes, washers, and steel tubes remain in proper orientation. Check overall tightness and adjust if needed as each grip is tightened. Repeat the float-securing process until all are firmly on the rope.
Step 7: Form Hard Eye
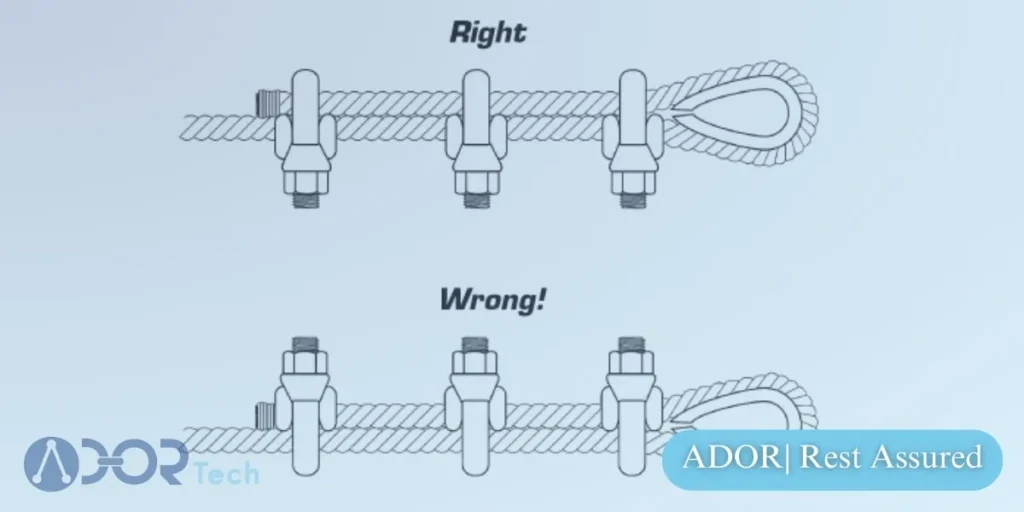
Step 7 for safety boom installation: To create an anchor loop at the non-terminated wire rope end, bend the loose end back onto itself to form the desired eye size. Temporarily install two loose wire rope grips around the overlapping wire sections.
Step 8: Fit the Thimble
Step 8 for safety boom installation: Place the steel thimble entirely into the wire rope eye-opening. Slowly slide the temporarily installed grips along the wire to reduce eye size until the thimble is held tightly in the ideal position. Hammer grips as needed to move along the wire. Use at least three grips firmly tightened to secure the eye.
Step 9: Connect Chain
Step 9 for safety boom installation: Attach the supplied short link chain lengths to both ends of the assembly using the smaller shackles provided. Make sure to insert pins and tighten the nuts completely—secure pins with the provided tamperproof spring pins through the nut cross holes.
Step 10: Install Shackle
Step 10 for safety boom installation: Fit the large anchor shackle through the last chain link on one end. Reinstall the shackle pin through the wire rope eye and tighten the nut by hand. This will connect to anchor points on shore.
Step 11: Install Shackle Pin
Step 11 for safety boom installation: Insert one spring pin through the cross hole on the shackle pin end. Use a spanner to tighten the shackle nut further, forcing it against the spring pin until the pin curls, locking the nut in place. Repeat pin installation as needed until the nut is fully secured.
Step 12: Launch the Boom
Step 12 for safety boom installation: With assembly complete, gently roll the boom into the water, taking care not to damage components. Tow or pull the boom from a vessel into the desired anchored position, using the installed shackles to connect to secure plates or points on shore. Install the provided padlock through the shackle for security.
Conclusion
Properly installing safety booms to restrict navigation access along dams and waterways is crucial for infrastructure protection and public safety. As we have covered, canoe-style safety booms provide a versatile, affordable option using modular components for straightforward on-site assembly. By following simple sequential steps to connect cylinders, cabling, tubes and shackles, unexperienced staff can deploy an effective containment system.
Setting up safety booms correctly ensures optimal security around spillways, intakes and fast river areas. A smooth installation allows easier adjustments, replacements and off-season storage to control costs. While specialized booms exist for particular environments, the customizable canoe boom model suits many scenarios. With proper annual deployment training, dam operators can benefit from managing their removable safeguards rather than relying on expensive permanent infrastructure installations. By implementing basic booming themselves, agencies responsibly enhance access control and hazard warnings during high-risk seasons.
Pre-assemble onshore: line up floats, thread the wire rope → bushes → washers → steel tubes in sequence, form a hard-eye with thimble, add chain + shackles, then launch and tow to position. This minimizes on-water time and tool changes while keeping parts organized.
CAB → best for canoes/kayaks and lighter craft; floats (Ø 400–1000 mm) with high-tensile wire rope (≥12 T break load). Great for marinas, reservoirs, nature reserves.
TCB → for heavier traffic / higher energy sites; adds an HDG steel core tube (up to Ø114 mm) with break load up to 72 T.
Both offer IALA-compliant colors and rapid assembly.
Survey flow, fetch, depth, bottom condition, visibility lines, and identify shore/bed anchor points before assembly. Install during calmer windows (low tide / light wind), and tow into position with a small workboat/winch for precise alignment.
A typical CAB/TCB build uses wire-rope grips, thimbles, shackles, short-link chain and the float-to-tube sub-assemblies. Follow the sequence so bushes/washers seat correctly and grips lock the wire. Final shore connection uses the large anchor shackle.


